Инструкция
How to Create a Bootable Windows USB Drive with UltraISO
Updated September 5, 2026
Continuing the series on recovering the Windows operating system, in this tutorial I'll show you how to create a full-featured bootable Windows USB drive in just a few minutes using UltraISO. A drive like this is normally used to restore the OS when something unexpected happens — in particular, when Windows can't boot on its own. The thing is, the built-in Windows tools are often powerless against fatal errors, so a bootable recovery USB is frequently the only thing left to fall back on. This tutorial covers how to create a bootable Windows USB (the approach applies to Windows 7, 8.1 and many editions of Windows 10 that ship as an ISO image). As mentioned above, we'll use the well-known tool for working with ISO images and burning discs — UltraISO.
On top of that, many of us no longer have optical drives, while Windows distributions used to ship mostly on DVDs and CDs (though that's far less relevant for newer editions). So it makes sense to write the system image for later recovery onto a USB stick and be done with the hassle of optical media. A bootable USB drive has plenty of advantages:
- you can always carry it with you, keeping a fairly universal kit for installing and recovering Windows on hand;
- you can create a bootable Windows USB with UltraISO step by step using the guide below — no complex configuration required;
- the flash drive can be rewritten with your own files at any time;
- the device is detected and boots on most system configurations and Windows versions (with the BIOS/UEFI set up correctly);
- a bootable USB drive is usually faster than an optical disc and isn't prone to read errors; in practice, installing from a USB stick took me about 15–20 minutes instead of 30+ minutes from a DVD.
Clearly, a Windows distribution with a recovery kit should always be within reach — at the critical moment it may turn out to be your only lifeline after a Windows crash. In my case, a drive like this saved me several times when Windows failed to boot on different machines: for example, on my home PC after a botched update the system kept restarting in a loop, and it was exactly this bootable USB with the installation image that let me get into the recovery environment and roll back. All I had to do was plug it in, pick it from the Boot Menu and launch recovery. So, without further ado, let's get to it — creating a flash drive with Windows "on board".
On this page
- What you'll need
- Step 1. Installing UltraISO — the app for writing a bootable USB
- Step 2. Downloading the Windows distribution from Microsoft
- UltraISO vs. Microsoft's official tools: which to choose
- Step 3. Writing and creating the bootable USB
- Step 4. Preparing the USB drive for a bootable OS
- Step 5. Writing the Windows distribution to the flash drive in UltraISO
- Step 6. Testing the boot of the created Windows distribution on the flash drive
- Quick 7-step algorithm
- Common problems and fixes
- Frequently asked questions
What you'll need
- A USB drive of at least 8 GB (for modern Windows 10 and Windows 11 images, as well as corporate and modified builds, it's better to use 16 GB or more);
- a Windows ISO image (a legal copy: an official Microsoft image or one created from your licensed system);
- the UltraISO program (a current stable version from the developer's official site);
- a computer or laptop with administrator rights to install and run UltraISO.
Step 1. Installing UltraISO — the app for writing a bootable USB
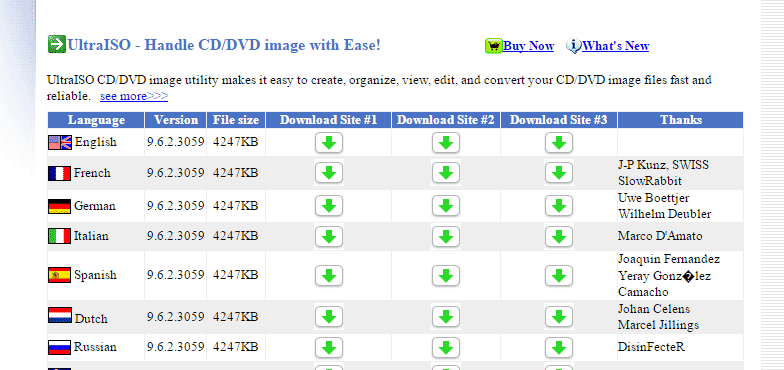
To quickly create a bootable Windows USB, we'll need the well-known UltraISO program in a current stable version. You can download it from the official site. It's recommended to use a legal copy of the program to avoid limitations and possible update issues.
UltraISO used to be updated fairly rarely, and its interface and menu structure changed little, so even in newer builds the commands are usually named the same as in the screenshots below. As of 2025, the current stable version is 9.76 (released in the summer of 2023), and the program effectively hasn't received major updates for a long time. This guide used one of the UltraISO 9.x versions — in more recent builds the menu items generally look the same.
Important note about the free version. The free trial of UltraISO has a hard limit: it won't work with images larger than 300 MB. Since any Windows installation ISO weighs several gigabytes, to write a bootable USB you'll need either a paid license (Premium) or one of the free alternatives — for example, Rufus or Microsoft's official Media Creation Tool (more on those in the table below).
Step 2. Downloading the Windows distribution from Microsoft
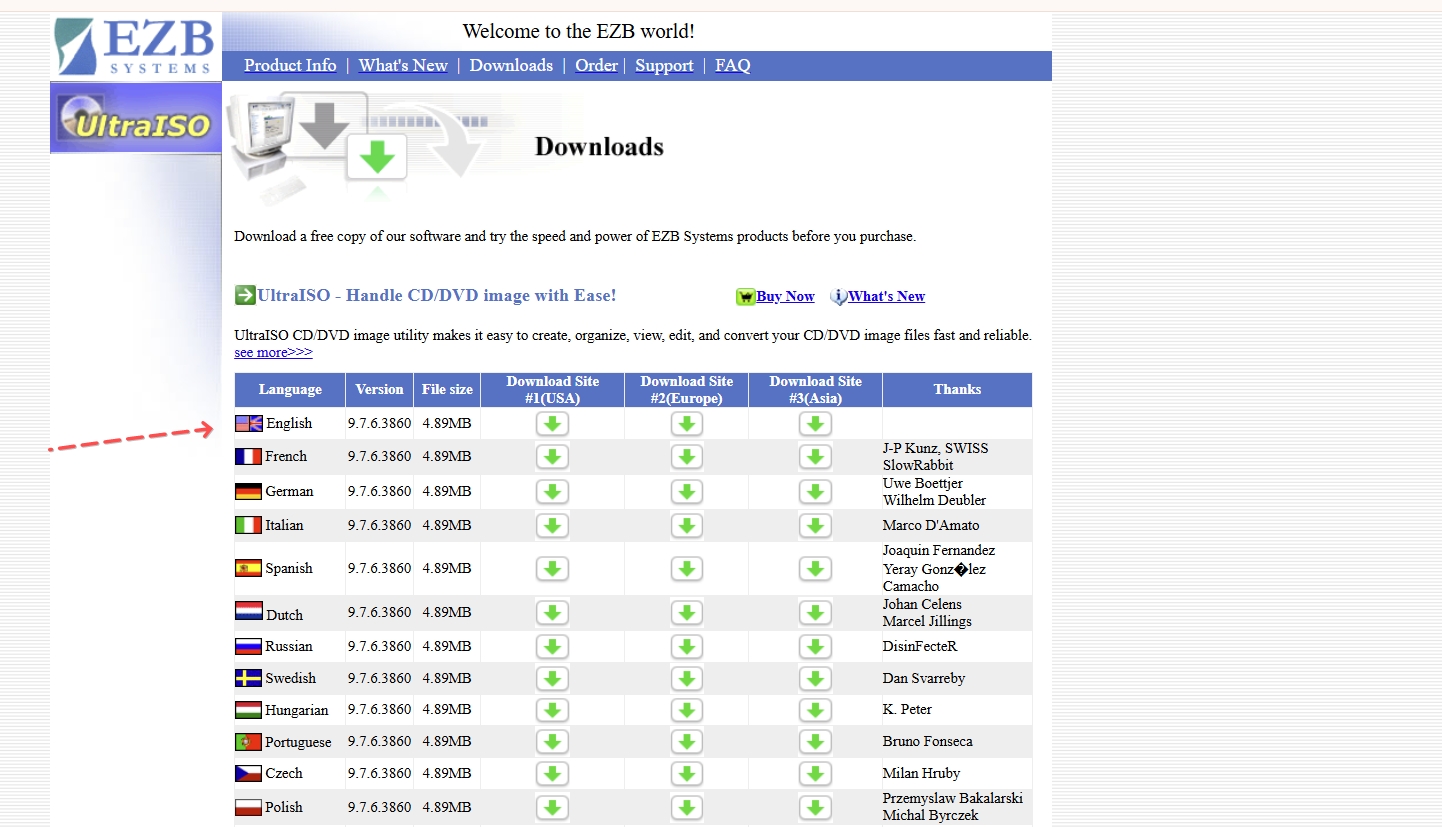
You can download the Windows distribution you need to write to the USB from Microsoft's official site. For Windows 10 and Windows 11, Microsoft offers its own Media Creation Tool, which downloads the required version itself and can write it straight to a USB drive. Up-to-date download links are always available on the official pages: download Windows 10 and download Windows 11. General guidance on installation media is described in Microsoft's help.
You may have a licensed or evaluation copy of Windows to build a rescue drive from; in that case you can create a system image using suitable backup tools and then open that ISO in UltraISO. In practice, though, it's more convenient to use a ready-made installation-disc ISO downloaded from Microsoft's site or obtained from your legal copy of Windows — UltraISO handles it more easily when creating the USB drive you'll later use to boot and rescue Windows.
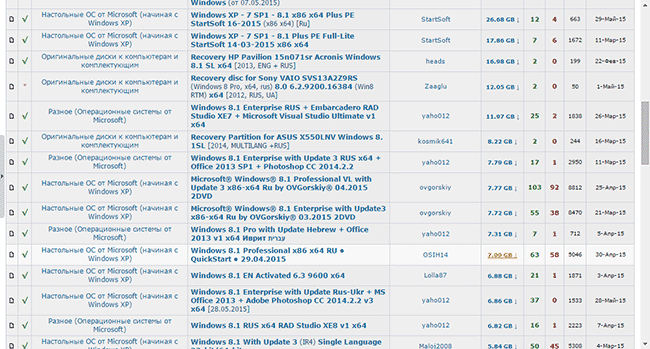
In principle, almost any ISO image of a Russian- or English-language Windows 7, 8.1 or compatible Windows 10 distribution will do for our purposes, whether it's the 32- or 64-bit edition. The distribution written to the bootable USB can range from 2 to 7 GB and up, so make sure the flash drive has enough room to build the Windows boot media. In my case I used the ISO image W8.1x64_Enterprise_Reactor, about 4 GB in size, and an 8 GB flash drive was enough.
Relevant for Windows 10 and 11. With modern Windows images, the install.wim file inside the sources folder often exceeds 4 GB, and the FAT32 file system can't store files larger than 4 GB. Because of this, writing such an image directly to a FAT32 drive by simple copying will fail. There are three ways around it: use the Media Creation Tool (it uses a compressed install.esd smaller than 4 GB), write the drive in NTFS with Rufus, or split install.wim into parts using the DISM command — that method is described in detail in Microsoft's official documentation. That's exactly why the classic method in this article works most reliably, without caveats, on Windows 7 and 8.1 images.
Important: for correct and safe operation, it's recommended to use only official, unmodified ISO images. Unofficial builds may contain malicious code, altered key files, or cause errors during installation and activation. The method described below also works in general terms for later versions of Windows, provided they ship as an ISO image and are supported by your hardware platform (BIOS/UEFI, GPT/MBR).
UltraISO vs. Microsoft's official tools: which to choose
| Option | Pros | Cons |
|---|---|---|
| UltraISO | Supports ISO images, simple interface, works with older Windows versions and manually created images | Full functionality only in the paid license (the free trial is limited to images up to 300 MB); requires downloading the ISO separately |
| Official Media Creation Tool | Microsoft's own tool; downloads the required Windows 10/11 version itself and can write it straight to a USB; sidesteps the FAT32 problem via a compressed install.esd | Doesn't work with every older Windows version, needs a stable internet connection, and doesn't always let you use an ISO you already have |
| Rufus (free) | Free and open-source, faster than MCT, can write images with an install.wim >4 GB in NTFS while keeping UEFI boot, and flexibly configures the partition scheme (GPT/MBR) | Third-party software; on some firmware, NTFS may have quirks with Secure Boot |
Step 3. Writing and creating the bootable USB
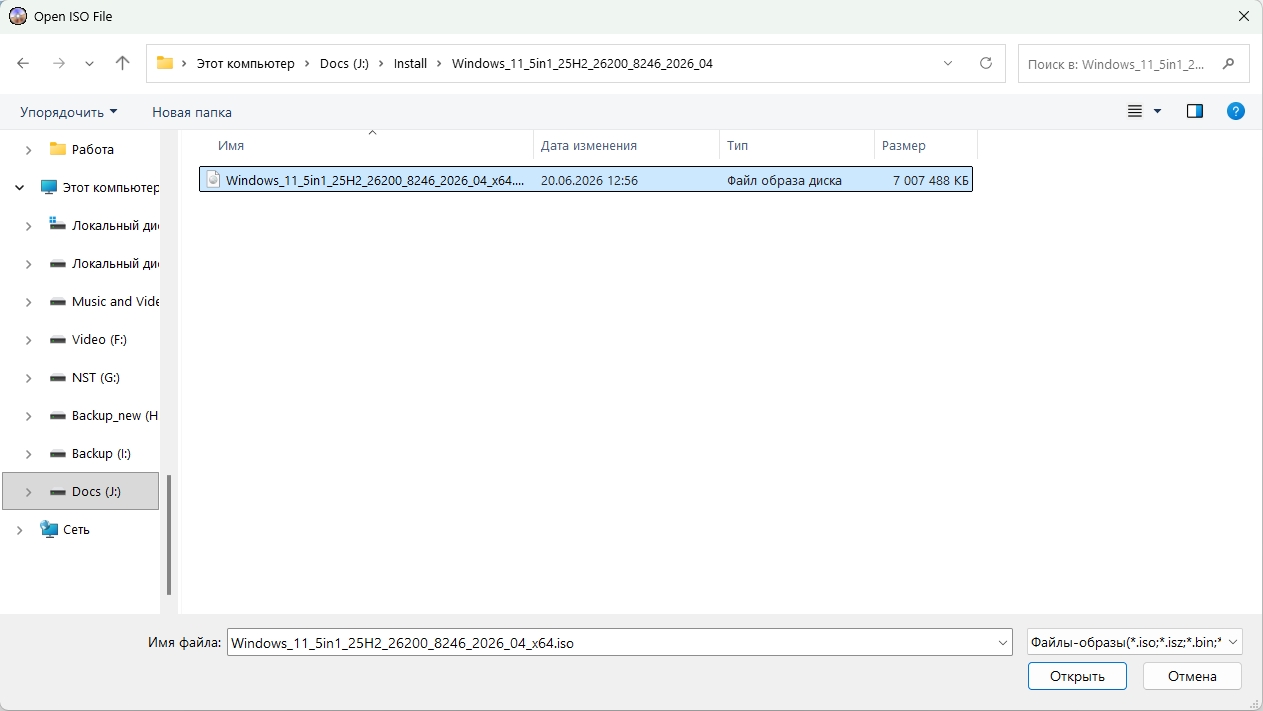
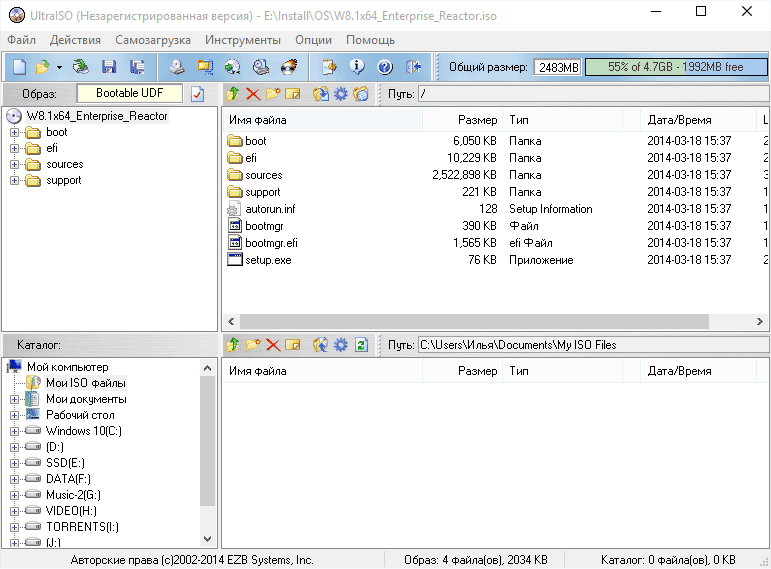
Launch UltraISO. Choose the menu command "File - Open...", and point the program to the ISO image for creating the bootable Windows USB. In the right-hand part of the UltraISO window you'll see the contents of the Windows installation distribution that will be written to the flash drive.
After opening the ISO image, check that the right-hand panel shows the elements typical of a Windows installation disc: the boot and sources folders, plus the setup.exe file. This is the standard structure that makes it easy to confirm you've selected an actual installation image. At this point it's worth making sure you've opened the Windows edition and language you plan to install or use for recovery.
Step 4. Preparing the USB drive for a bootable OS
To make the drive bootable, insert it into a USB port on your computer. Format it in the FAT32 file system. This is needed so the computer can read the data from the drive without issues at boot time, because FAT32 is a universal system for creating bootable drives that practically every BIOS and UEFI firmware understands.
In practice FAT32 ensures compatibility with most older BIOS and UEFI firmware, since UEFI expects the boot partition to be in FAT32. However, FAT32 has a limitation — the maximum size of a single file is 4 GB, which is why modern Windows 10/11 images may not fit on it directly (see the note above). For such images, people use NTFS via Rufus or split the install.wim. By the way, in Windows 11 Microsoft removed the old 32 GB limit on formatting FAT32 (via the command line you can now go up to 2 TB), but the 4 GB per-file limit remains. This guide uses FAT32, because for Windows 7 and 8.1 images this option works "out of the box" most often across different computers. In my tests, drives of 8–16 GB worked reliably; on small capacities (4 GB) some Windows images simply won't fit.
Warning: formatting deletes all files on the drive. Before you start, be sure to save any important data elsewhere. Once, out of carelessness, I formatted a drive that held the only copy of some work documents — ever since, I always double-check a drive's contents before writing to it.
- If you're not sure how to format a hard drive, read the article at the link.
- An article on how to properly format a USB flash drive
Step 5. Writing the Windows distribution to the flash drive in UltraISO
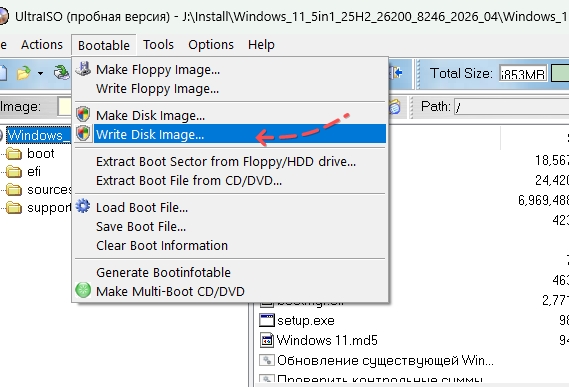
Fortunately, the UltraISO developers have already taken care of us, so to write the files needed to create a bootable Windows 7 or 8 USB, you can use the program's "Bootable - Write Disk Image" option. See the screenshot below for how to do it.
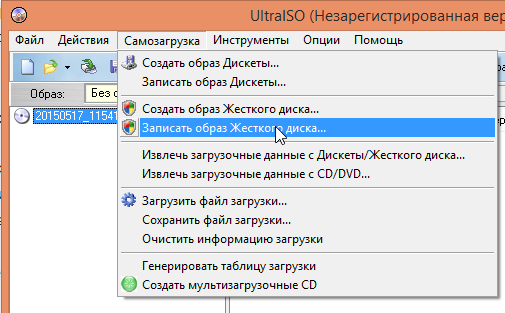
Then proceed step by step:
- Open the "Bootable → Write Disk Image…" menu.
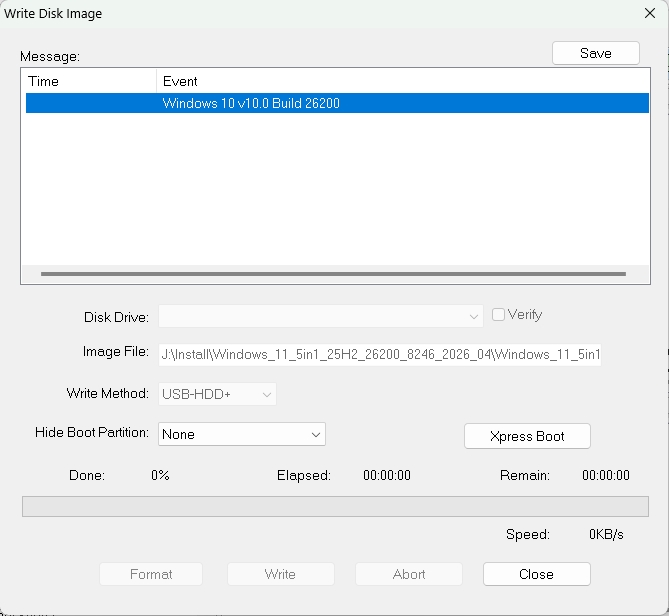
- In the "Disk Drive" list, select the correct flash drive (make sure it's the drive you can safely erase).
- In the "Writing Method" field, choose "USB-HDD+" — it works well for bootable Windows drives.
- If needed, format the flash drive in FAT32 using UltraISO's own tools (if you forgot to do it earlier).
- Click the "Write" / "Write Disk Image" button and wait for the writing process to finish.
Once writing starts, UltraISO fully copies the ISO image structure to the drive and makes it bootable. In my tests, the write process took 5 to 10 minutes depending on the speed of the drive and the port: on an old USB 2.0 drive, writing a 4 GB image took about 9 minutes, whereas on a USB 3.0 drive the same image was written in under 4 minutes.
Sometimes typical errors can come up. For example, if UltraISO shows "Access denied" or "Device is busy", close all Explorer windows and any programs that might be using the drive (antivirus scanners, sync utilities), then repeat the write. In some cases, using a different USB port helps.
Step 6. Testing the boot of the created Windows distribution on the flash drive
Once the boot drive is created, open Explorer or another file manager (for example, Total Commander) and confirm that the Windows OS files are present on the flash drive: you should see the boot and sources folders, the setup.exe file, and other elements of the installation disc.
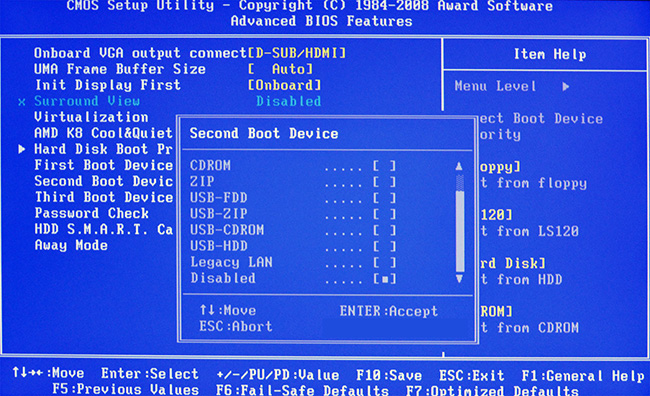
Next, restart the computer and set the Windows USB drive as the boot device in the BIOS. Then save the changes and make sure the computer starts from the flash drive — that is, successfully loads the Windows shell. A sign of a successful write: after the restart you see the initial "Install Windows" screen or the recovery environment, rather than the normal boot of the installed system.
On more modern systems, UEFI is used instead of the classic BIOS. In that case, when you power on the computer there's often a way to bring up a quick boot-device menu (Boot Menu) with a dedicated key — it may be F8, F11, F12, Esc, or another key depending on the manufacturer (for example, on many ASUS motherboards it's F8, on Gigabyte it's F12, and on Lenovo laptops it's F12 or a separate Novo button). In my case, after setting things up correctly, the boot order looked like this: first the USB drive, then the hard disk. If the drive isn't visible, switching between UEFI/Legacy (CSM) modes and checking the Secure Boot setting sometimes helps.
Quick 7-step algorithm
- Install UltraISO (a current version from the developer's official site).
- Download or prepare a legal Windows ISO image (7/8.1/10) of the right architecture and language.
- Open the ISO image in UltraISO via "File → Open…" and check the structure (boot, sources, setup.exe).
- Plug in the flash drive and format it in FAT32 (at least 8 GB).
- In UltraISO, choose "Bootable → Write Disk Image…", select the drive and the "USB-HDD+" method.
- Start writing and wait for the operation to finish (a few minutes, depending on the drive's speed).
- Restart the computer, pick the drive in BIOS/UEFI or the Boot Menu, and confirm that the Windows installer or recovery environment launches.
Summary. I hope you've grasped the principle of creating a bootable USB using UltraISO. In essence, you need to prepare a Windows ISO image, format the drive correctly, and write the image via the "Write Disk Image" option. The method works for creating a bootable USB with Windows 7, 8.1 and many editions of Windows 10, as long as you have an ISO image of the corresponding version. For fresh Windows 11 images with a large install.wim, it's more convenient to use the Media Creation Tool or Rufus — they get around the FAT32 limitation from the start.
Of course, there are other programs and methods for writing a Windows distribution to a USB drive, CD or DVD, including Microsoft's official utilities. In practice, the choice of tool depends on your task, the Windows version, your internet speed, and the supported hardware (BIOS/UEFI, GPT/MBR). Below are a few typical problems you might run into, along with basic fixes.
Common problems and fixes
- The drive doesn't appear in the boot list. Try another USB port (USB 2.0 is often more reliable), disable Fast Boot in BIOS/UEFI, and on older systems enable Legacy/CSM mode. Make sure the drive is actually written as bootable and shows up on another computer.
- The computer still boots the installed Windows from disk. Check the boot order (Boot Priority), temporarily move the USB device to the top, or use a separate Boot Menu (F8/F11/F12/Esc depending on the model).
- "File too large" error when writing a Windows 10/11 image. This runs into FAT32's 4 GB per-file limit (install.wim is bigger). Write the drive in NTFS via Rufus, use the Media Creation Tool, or split install.wim with the DISM command (see the note in Step 2).
- Installation stops with an error. In this case, check the integrity of the ISO image (checksums, official origin) and, if needed, rewrite the drive or use a different one.
In general, I'm looking forward to your questions in the comments. Share your experience: which Windows versions you've written to USB drives, which errors you ran into, and how you solved them — it'll help other readers avoid common problems.
Frequently asked questions
What size USB drive do I need for bootable Windows?
For most Windows 7/8.1/10 ISO images, an 8 GB drive is enough. In my tests, images around 4 GB fit comfortably on such a drive. For Windows 11 and modified or corporate images, it's better to use 16 GB or more — before writing, check the size of the ISO file and compare it with the available capacity of the drive.
What should I do if the drive won't boot?
First, check the boot order in BIOS/UEFI and make sure the USB drive is first. Try a different USB port (switching from USB 3.0 to USB 2.0 often helps), and if necessary disable Secure Boot or enable Legacy/CSM mode for older systems. If that doesn't help, rewrite the image to a different drive and check the ISO image for integrity.
Will this method work for Windows 10 and Windows 11?
For Windows 10 the method generally works if you have an ISO image. For Windows 11 there's a catch: the install.wim file inside the image often exceeds 4 GB, and FAT32 can't store such files. In that case it's more convenient to use Microsoft's Media Creation Tool (it produces a compressed install.esd) or Rufus with the NTFS file system. Also keep architecture, language and boot type (BIOS/UEFI) in mind. UltraISO remains handy when you already have an ISO and its size fits within FAT32's limits.
Can I use NTFS instead of FAT32?
In most cases, for maximum compatibility with different BIOS/UEFI firmware, FAT32 is recommended, since UEFI expects the boot partition in this format. However, some modern systems can boot from NTFS partitions, and tools like Rufus provide UEFI boot from NTFS via their own mechanism. NTFS is mandatory when the size of install.wim exceeds FAT32's 4 GB per-file limit (relevant for Windows 10/11). If you're in doubt and the image is small, choose FAT32 as the more universal option.
Помощь
Не нашли ответ?
Опишите проблему — подскажем, куда двигаться дальше, и по возможности дополним материал.
Комментарии
Загружаем обсуждение…