Инструкция
How to Clone a Bootable USB Drive: 3 Free Tools Compared
Updated September 7, 2026
Cloning a bootable USB drive or making an exact copy of an SD card isn't as straightforward as it sounds. You can't just drag files across — the source drive contains hidden structures (boot sectors, partition tables, unallocated space) that plain file copying leaves behind. That's why you need a tool designed for byte-level duplication.
This guide walks through three free (or freemium) utilities that do the job properly: ImageUSB, USB Image Tool, and AOMEI Partition Assistant. At the end we'll also cover popular alternatives — Rufus and Ventoy — and troubleshoot the errors people hit most often when cloning removable media.
On this page
- File copying vs. cloning: what's actually different
- Method 1. ImageUSB
- Method 2. USB Image Tool
- Method 3. AOMEI Partition Assistant
- Which one should you pick?
- Alternatives: Rufus and Ventoy
- Frequently asked questions
- Fixing common cloning problems
File copying vs. cloning: what's actually different
Copy-pasting the contents of a flash drive isn't the same as cloning it, and the difference matters most when the drive is bootable. A bootable USB contains three things: the visible files you see in Explorer, an MBR or GPT partition table, and a boot sector (or EFI System Partition on modern drives) that tells the computer how to start. Regular file copying moves the first, ignores the other two, and the resulting drive won't boot.
Byte-level cloning solves this by working at the sector level rather than the file level. Instead of asking Windows "give me the files on this drive," it reads the raw contents of every sector, from the first byte to the last, including the boot code and empty space. The output is either a disk image file or an identical clone on another drive. That's what all three tools in this guide do, and it's the only reliable way to duplicate a bootable USB.
Method 1. ImageUSB
ImageUSB is a small, portable utility from PassMark Software, the company behind PerformanceTest and OSForensics. It's freeware, currently at version 1.5.1007 (2025), and runs on Windows 7 through Windows 11 in both 32- and 64-bit editions.
The tool has one standout feature: it can write an image to multiple USB drives simultaneously, limited only by the number of available USB ports. If you regularly prepare identical installer sticks — for a lab, a computer repair shop, or a distribution — this saves a lot of sequential work.
ImageUSB also supports post-write verification using MD5 and SHA1 checksums. Once the write finishes, it re-reads the target drive and compares the hash against the source image, flagging any mismatches. Note that some older reviews mention SHA256 support — that's incorrect; the tool uses MD5 and SHA1.
Here's how to clone a drive with ImageUSB:
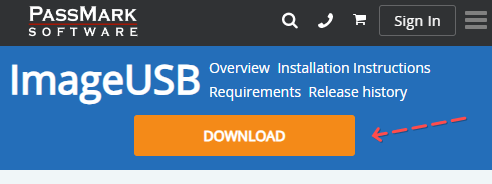
Step 1. Download the ZIP archive from the official PassMark page. The download is about 2.3 MB — no installer required.
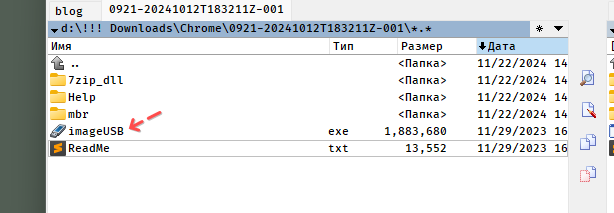
Step 2. Extract the archive to any folder.
Step 3. Run ImageUSB.exe. The main window will open.
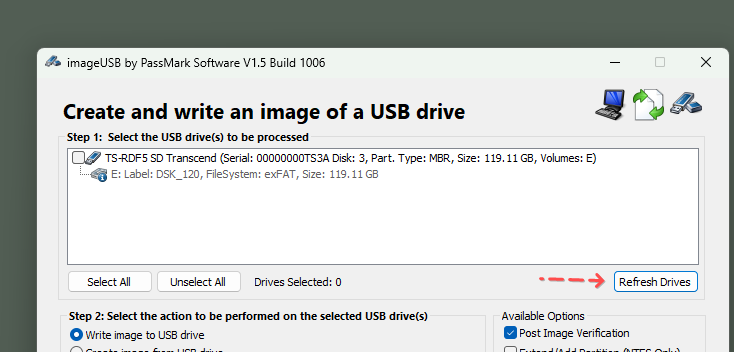
Step 4. Select the source USB drive from the list. If it doesn't appear, click Refresh Drives.
Step 5. The next step shows every available operation: create an image from a drive, write an image to a drive, zero-fill, or reformat.
Step 6. Pick your source drive and choose Create image from USB drive.
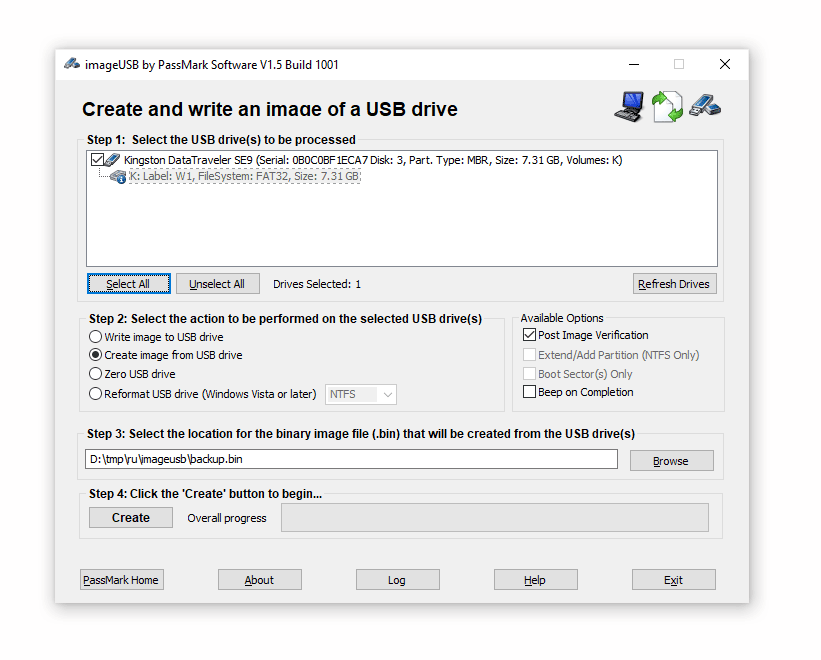
Step 7. Choose where to save the image file using the Browse button.
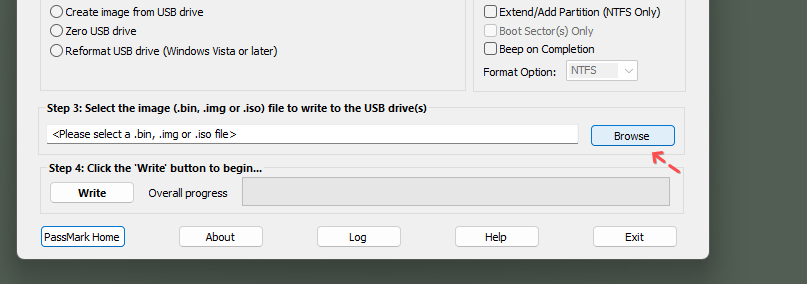
Step 8. Enable Post Image Verification. This adds a checksum comparison after the image is written and is worth the small time overhead.
Step 9. Click Create to start. For an 8 GB drive, expect the process to take 10–15 minutes, depending on your USB port speed and the quality of the drive itself. Cheaper drives are dramatically slower on the write pass.
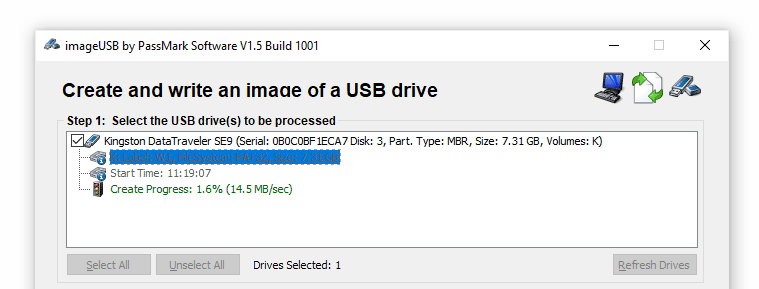
To restore the image onto another drive, repeat steps 3–6 but select Write image to USB drive and point ImageUSB at the file you saved earlier.
Method 2. USB Image Tool
USB Image Tool is a free utility developed by Alexander Beug. It's arguably the friendliest option in this roundup — the interface is clean, all your connected drives are listed on the left, and the two buttons you need (Backup and Restore) are hard to miss. Download it from the developer's site or via TechSpot.
Like ImageUSB, USB Image Tool is portable — extract the archive and run USB-image-tool.exe. Then:
- Select your source USB drive from the list on the left side of the window.
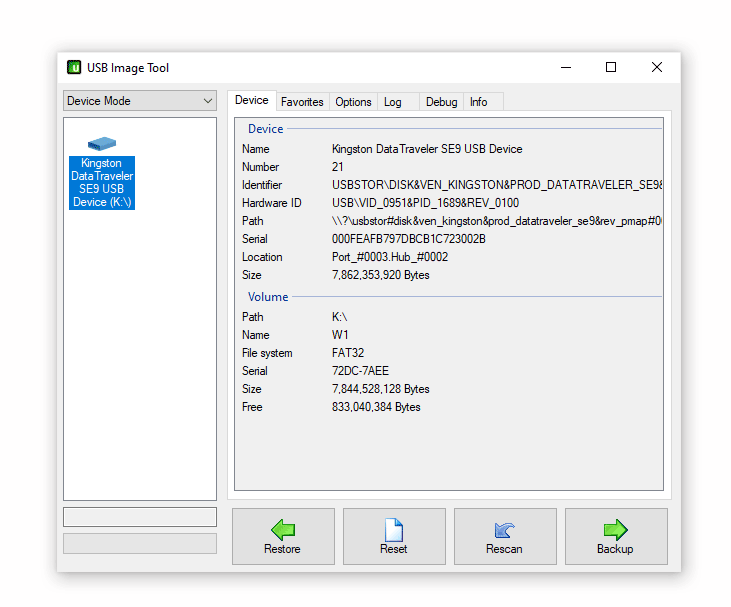
- Click the Backup button in the bottom-right corner.
- Choose a location on your hard drive and save the image file.
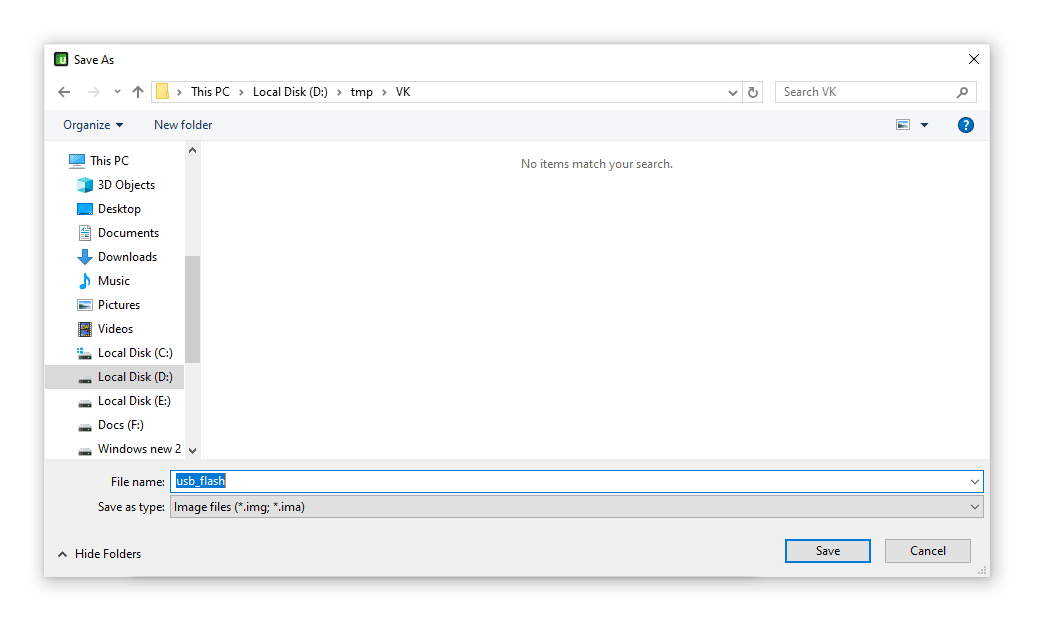
- Wait for the image to finish saving. Progress appears in the bottom-left corner as Saving image.
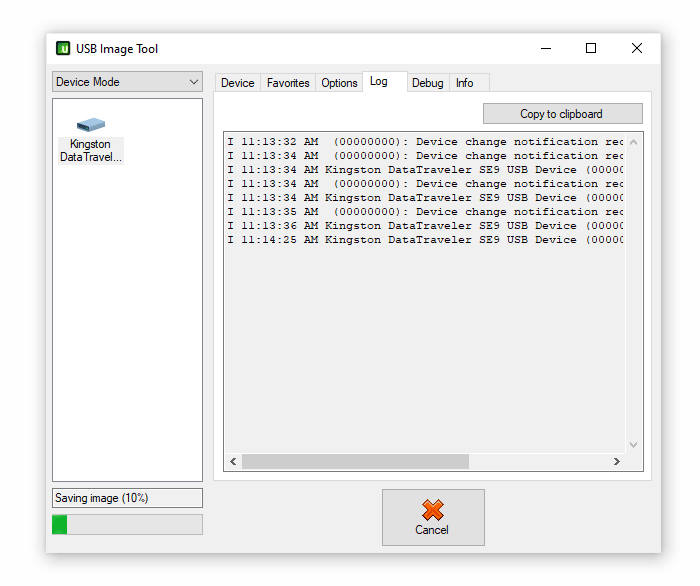
- To restore the image to another drive: select the destination drive, click Restore, and pick your saved image file.
The main trade-off compared to ImageUSB is that USB Image Tool doesn't offer post-write checksum verification. For a one-off backup that's usually fine, but if you're preparing bootable installers for critical use, the verification step in ImageUSB is worth having.
Method 3. AOMEI Partition Assistant
AOMEI Partition Assistant is a general-purpose disk management tool that can resize, merge, split, and convert partitions on hard drives and USB media. Disk cloning is one feature among many, which makes it overkill if all you need is a copy of a flash drive — but useful if you're already using it for other tasks.
Important note on editions and pricing:
- Standard edition is genuinely free, but disk and partition cloning are locked behind the paid version. You'll see the option in the interface, but the "Apply" step will prompt you to upgrade.
- Professional edition is priced at about $49.95 for a two-PC license at time of writing (check the official site for current pricing — AOMEI runs sales frequently). This is the edition you need for cloning.
Download from the official page. Installation is quick and doesn't require registration.
Cloning workflow (with a Professional license or its trial mode):
- Open AOMEI Partition Assistant.
- In the left panel, expand All Tools and click Disk Clone Wizard.
- Pick Clone Disk Quickly from the two options. The alternative — Sector-by-Sector Clone — creates a truly byte-identical copy, but the destination has to be at least as large as the source, and the process takes noticeably longer.
- In the Select Source Disk screen, choose your USB drive and click Next.
- In the Select Destination Disk screen, choose the target drive and confirm.
- Click Finish. The operation is queued but not yet running.
- Back in the main window, click Apply in the top-left corner to actually execute the operation.
- Wait for the clone to complete. AOMEI will show a confirmation dialog.
The honest verdict on AOMEI: if you already own a Professional license or need advanced partition manipulation, the Disk Clone Wizard does the job well. If you just want to duplicate a bootable USB, save the money and use ImageUSB — it's built specifically for this task and it's free.
Which one should you pick?
Here's a quick decision matrix:
| Tool | Price | Verification | Batch cloning | Best for |
|---|---|---|---|---|
| ImageUSB | Free | MD5 and SHA1 | Yes, multiple drives at once | IT technicians, repeatable workflows, mass deployment |
| USB Image Tool | Free | None | No | One-off backups, users who want the simplest UI |
| AOMEI Partition Assistant Pro | ~$49.95 | Windows-level only | No | Anyone who needs a full partition manager |
Bottom line:
- For regular cloning of bootable USB drives, use ImageUSB. Free, verified, and it can handle multiple drives at once.
- For a single quick backup, USB Image Tool has the friendliest interface.
- AOMEI Partition Assistant Pro is only worth buying if you'll use its broader partition management features.
Alternatives: Rufus and Ventoy
Two other tools come up constantly in this space, but they solve a different problem — worth knowing when to reach for them instead.
Rufus is the most popular utility for creating a bootable USB drive from an ISO file. It doesn't clone an existing drive — it takes an ISO (a Windows or Linux installer, for example) and writes it to USB in a way that boots correctly. If you already have the source ISO and just need a fresh bootable stick, Rufus is faster and more reliable than cloning an old one.
Ventoy takes a completely different approach: you install it once on a USB drive, then copy ISO files onto the drive like ordinary documents. At boot time, Ventoy shows a menu and lets you pick which ISO to boot. This turns a single USB stick into a multi-boot toolkit — Windows installer, Linux distributions, antivirus rescue disks, all in one place.
When to use what:
- Duplicating a bootable USB that's already set up exactly the way you want it → ImageUSB or USB Image Tool.
- You have an ISO and need one bootable USB, quickly → Rufus.
- You want one drive that can boot several different systems → Ventoy.
Frequently asked questions
How do I copy a Windows 10 bootable USB to another drive?
The cleanest way is with ImageUSB. Plug in both drives, select the source, and run Create image from USB drive to save an image file to your hard drive. Then select the target drive and run Write image to USB drive, pointing at the file you just saved. Turn on Post Image Verification for a checksum sanity check. Important: the destination drive has to be at least as large as the source — even a 100 MB shortfall will abort the write.
Can I add other files to a Windows bootable USB?
Yes, as long as there's free space. Extra files added alongside the Windows installer won't break the boot process — they're just cargo. What you must not do is delete or modify the installer files themselves, or move them out of the drive root. If you later clone the drive, everything you added will be included in the copy.
Why won't my cloned USB boot?
Three common culprits. First, plain file copying was used instead of byte-level cloning — the boot sector wasn't copied. Second, the destination drive is smaller than the source, and the clone was truncated. Third, the source drive's boot sector was already damaged. The fix is to use a proper cloning tool (ImageUSB, USB Image Tool) or, if you have the source ISO, rebuild the drive from scratch with Rufus. Enable Post Image Verification in ImageUSB to catch write errors while they're still fixable.
Why does the image file take up as much space as the drive?
Byte-level cloning copies every sector, including empty ones. A 16 GB drive produces roughly a 16 GB image file, regardless of how much actual data is on it. That's the price of an exact copy. If disk space matters more than fidelity, and you have the original ISO, it's more efficient to rebuild the drive with Rufus — the result will be smaller and guaranteed bootable.
What if I get an "Access denied" error while writing?
Run the tool as administrator (right-click the executable and choose Run as administrator). Check whether the drive has a physical write-protect switch — some SD card adapters and older USB sticks have one. Temporarily disable your antivirus during the write; some AV products block direct sector access and misinterpret it as suspicious behavior.
Fixing common cloning problems
The process hangs at 99%
Don't cancel it. The final verification pass can take 2 to 5 minutes on its own — the tool looks frozen but is actually reading the destination drive to compute a checksum. If the hang genuinely never resolves, plug the drive directly into a motherboard USB port (avoid hubs and extension cables), and use a USB 3.0 port if you have one.
Checksums don't match
Three possibilities. The drive is faulty or counterfeit — test it with H2testw or a similar utility to check for fake capacity or unstable sectors. Or Windows wrote to the drive during the verification step (automount can do this). Or the drive is from a no-name brand with unreliable NAND memory. The first two are fixable; the third means finding a better drive.
Write errors
Work through this checklist in order: run the tool as administrator; disable any physical write-protect switch; temporarily disable antivirus; check that your hard drive has enough free space for the image; try a different USB port (motherboard, not hub); try a different cable or adapter if you're using USB-C. If all else fails, the drive itself may be dying.
Cloned drive isn't recognized
Sometimes after a byte-level clone, Windows can't mount the drive — the partition table looks fine but no drive letter is assigned. Open Disk Management (diskmgmt.msc) and manually assign a letter. If the drive shows as completely unallocated, the write didn't finish — repeat the clone with verification enabled.
Bad advice you'll see elsewhere: "defragment the flash drive first"
Some guides suggest defragmenting the source drive before cloning. Don't. Flash drives use NAND memory with a finite number of write cycles, and defragmentation burns through those cycles for no benefit — the cloning process reads sectors, not files, so fragmentation is irrelevant. You'll just wear the drive out faster.
Помощь
Не нашли ответ?
Опишите проблему — подскажем, куда двигаться дальше, и по возможности дополним материал.
Комментарии
Загружаем обсуждение…